This guide demonstrates how to repurpose an old Android smartphone or tablet into a versatile server for your local area network. By leveraging a powerful Linux terminal emulator called Termux, users can easily set up a web server, a database, or even a home automation system using a device that would otherwise be gathering dust. The process involves installing specific software packages and configuring basic server functionalities, making it accessible even to those with limited server administration experience. This approach provides a practical and cost-effective solution for various experimental and development needs, turning an unused gadget into a valuable asset.
The transformation of an idle Android device into a functional server begins with the installation of Termux, a Linux terminal emulator. Unlike standard installations, it is crucial to obtain Termux from F-Droid, an alternative app store, to ensure access to the most current version. Once Termux is operational, users can remotely manage the device via SSH, simplifying the installation and configuration of server software. The article outlines the process of deploying an Apache web server with PHP support and even demonstrates how to set up a sample website. This project not only showcases the versatility of Android devices but also encourages creative problem-solving by utilizing existing technology for new purposes.
Converting Your Android Device into a Server
Repurposing an old Android device into a local area network (LAN) server is a surprisingly straightforward and cost-effective endeavor. The core of this transformation lies in Termux, a robust Linux terminal emulator that provides a powerful command-line environment directly on your Android phone or tablet. Instead of letting your dormant device collect dust, you can breathe new life into it by turning it into a development platform, a test server for web applications, or even a personalized media hub. The versatility offered by Termux allows for a wide array of server functionalities, limited only by your imagination and the device's hardware capabilities. This process is ideal for hobbyists, developers, and anyone looking to experiment with server technologies without investing in dedicated hardware.
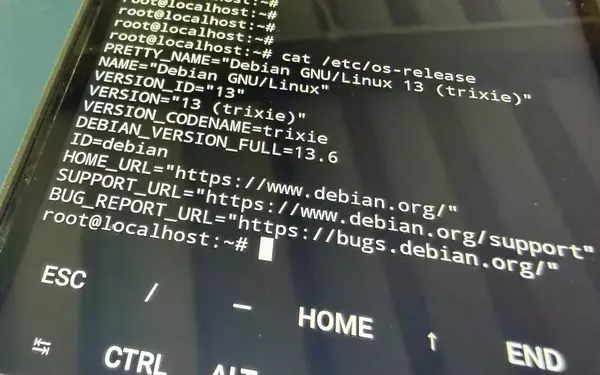
The journey begins by installing Termux, but with a critical caveat: avoid the outdated version on the Google Play Store. Instead, download the F-Droid app store and install Termux from there to ensure you have the latest features and security updates. Once Termux is set up, you'll gain access to a Linux-like command-line interface, where you can install various packages. For instance, setting up a LAMP (Linux, Apache, MySQL, PHP) server involves installing Apache2, PHP, and other essential tools. Remote access via SSH is highly recommended to streamline configuration and management, allowing you to control your Android server from a desktop computer using a familiar keyboard. This setup empowers you to host simple websites, develop applications, or even explore complex network services directly from your old phone.
Setting Up and Deploying Your Android-Powered Website
Once Termux is installed and configured on your Android device, the next step involves preparing the environment for hosting a website. This includes updating the package list, installing an SSH client for convenient remote access, and setting up the necessary web server components. The process is modular, allowing you to tailor the server's capabilities to your specific needs. For a basic web server, you'll typically install Apache2 and PHP, which enable the device to serve dynamic web content. With these foundational elements in place, you can then proceed to deploy your website, whether it's a simple static page or a more complex dynamic application.
The detailed steps for setting up your Android-powered website involve a sequence of commands executed within the Termux environment. First, ensure all packages are up to date using the `pkg update` command. Next, install OpenSSH (`pkg install openssh`) to enable secure remote access from another computer, which significantly eases the configuration process. After locating your device's IP address and setting a password for your Termux user, you can connect via SSH and proceed to install the LAMP stack components (`pkg install apache2 php php-fpm mariadb git wget`). Starting the Apache server with `apachectl start` makes your device ready to serve web pages. You can then test the server by navigating to its IP address in a web browser. Finally, deploy your website files to the Apache document root, either by manual transfer or using `git clone` for version-controlled projects, transforming your old Android phone into a fully functional web server.